Honestly, stop what you’re doing. I need to tell you about this Easy Chicken Stir-Fry. I’m talking about the kind of dinner that saves your bacon on a Tuesday when you’ve got zero energy left, but your stomach is performing an opera that demands a truly killer meal, not just cereal.
I used to be a stir-fry skeptic, I truly was. Every time I tried it, it was just… soggy. Like sad, floppy vegetables swimming in a watery sauce. Ugh. But then, one desperate, rain-soaked night—when the sheer thought of ordering delivery made me want to curl up and weep—I realized the secret: HEAT. Max it out. That’s the whole darn thing! When you hear that oil start to shimmer and spit and you think, “Okay, maybe that’s too hot,” that’s when you start cooking. Oh, and make sure you use a wok or a super-wide skillet. Don’t even bother with the little saucepan. Trust me on this.
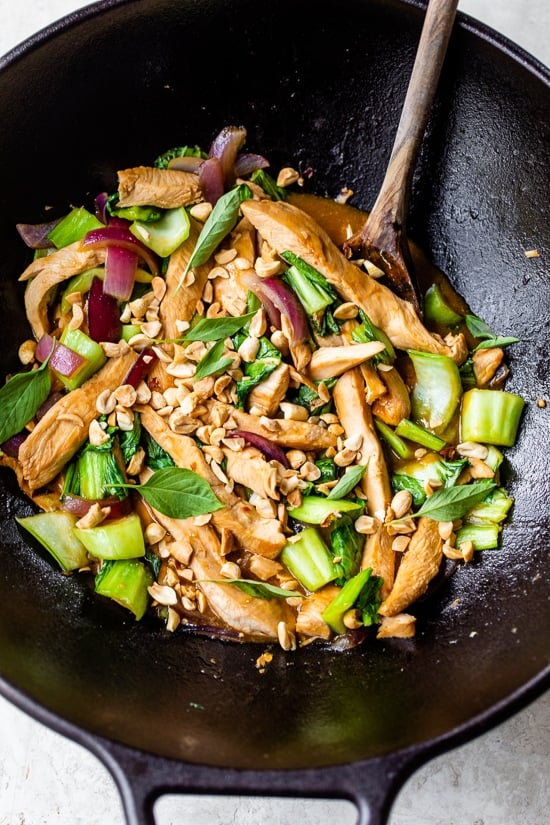
This recipe? It’s the one that turned me into a stir-fry evangelist. It’s got that perfect toothsome snap from the veggies, that sweet-savory stickiness from the sauce, and the chicken is impossibly tender. The first time I made it, I was so excited I almost dropped the whole bowl trying to take a picture! (I totally spilled a little sauce on my favorite apron, which is now a permanent reminder of its deliciousness.) Ready? Let’s go!
⚡ Quick Facts Table
| Category | Details |
| Prep Time | 15 Minutes |
| Cook Time | 10 Minutes (Seriously!) |
| Total Time | 25 Minutes |
| Servings | 4 Hungry People |
| Difficulty | Easy-Peasy, Killer Results |
🌶️ What You’ll Need: The Goods!
For the Crispy Chicken & Veggies
- 1.5 lbs Boneless, skinless Chicken Breast or Thighs (Thighs are more forgiving and honestly, my preference—cut ’em into bite-sized pieces)
- 1 tbsp Sesame Oil (The aroma alone is worth it, but this also helps the sear.)
- 1 tbsp Cornstarch (Our secret weapon for a light, almost silky coating on the chicken!)
- 2 cups Broccoli Florets (Small ones, please! They cook faster and give you that great little crunch.)
- 1 large Red Bell Pepper (Sliced into thin strips—the color is just gorgeous, ya know?)
- 1 medium Yellow Onion (Sliced thick, so it holds its shape and doesn’t just melt away.)
- 2 tbsp High-heat Oil (Like vegetable or canola. Save your olive oil for salads!)
For the Killer Ginger-Garlic Sauce
- 1/4 cup Soy Sauce (I always use low-sodium, but seriously, use whatever you got—just remember to taste later and adjust the salt!)
- 2 tbsp Honey or Brown Sugar (That little bit of sweetness is essential for balancing the ginger and garlic.)
- 1 tbsp Rice Vinegar (Adds the perfect bright, essential tang.)
- 1 tbsp Fresh Ginger (Grated. Don’t even bother with the powdered stuff. It needs to be the fiery, fresh stuff!)
- 4 cloves Garlic (Minced. Yes, four. Garlic is life. Fight me.)
- 1 tsp Sriracha (Totally optional, but adds a fantastic little kick. You can always add more!)
- 1 tsp Cornstarch (Mixed into the sauce before cooking—this is what makes it gloriously thick and glossy.)
🍳 HOW TO COOK! (The High-Heat Hurry)
1. The Chicken Prep:
Toss the cut chicken pieces with the 1 tbsp sesame oil and 1 tbsp cornstarch in a medium bowl. Give it a good mix until everything is lightly coated. This step is critical! The cornstarch is what gives it that slightly brittle, perfect exterior instead of that weird, steamed vibe.
2. Wok Time (The Sizzle):
Get your wok or big skillet over high heat. Seriously, high. Add the 2 tbsp high-heat oil and let it get super-duper hot—you should see it shimmer slightly. Drop about half the chicken in (don’t overcrowd the pan!). You want to immediately hear that fantastic, high-pitched hiss and aggressive sizzle. Let it cook for about 2-3 minutes per side until it’s beautifully browned and slightly crispy. Get that batch out onto a plate, do the rest, and set aside.
3. The Veggie Crunch:
Toss the broccoli, pepper, and onion right into the hot wok. Add another tiny splash of oil if it looks dry. Stir-fry for only about 3-4 minutes. You’re going for vibrant color and a fantastic al dente snap, not mush. They should still be a little stiff—that’s the toothsome texture we crave! Get ready for a HUGE plume of fresh, slightly charred vegetable aroma—that’s the good stuff. Take them out and put them on the plate with the chicken.
4. The Sauce Magic:
Turn the heat down to medium-low. Whisk all your sauce ingredients together in a little bowl (soy sauce, honey, vinegar, ginger, garlic, sriracha, and the mixed-in cornstarch). Pour the whole darn thing into the pan. Stir constantly—it’s gonna bubble and start to thicken rapidly right before your eyes, turning into a gorgeous, glossy, sticky elixir. That garlic and fresh ginger smell filling your kitchen right now? That’s the smell of winning, my friend.
5. The Grand Finale:
Dump the chicken and all the veggies back into the pan. Stir it all really well for about 1 minute, making sure every single piece is coated in that gorgeous, sticky, yummy sauce. Serve immediately over rice or noodles. Done! See? Faster than takeout.
💡 NUTRITION & TIPS
Pro-Tips Section: Little Tweaks, Big Results
- [Substitution/Time Saver] Save time by using a bag of pre-cut frozen broccoli and letting it defrost while you chop the chicken. I’m a huge fan of this little cheat, especially when I’m running on fumes!
- [Essential Technique Tip] Don’t stir too often when searing the chicken. Give it time to build up a crust on the bottom before you touch it. That’s how you avoid the dreaded “steamed chicken” and get that crispy exterior. The key is high heat and patience (just a little!).
❓ READERS ASKED, WE ANSWERED
Q: My sauce always seems too thin. What did I mess up?
A: Okay, don’t panic! This is super common. You likely didn’t mix the cornstarch into the sauce mixture well enough before pouring it in, or maybe your heat was too low when you added it. The only way to get that perfect, thick, satiny gloss is high heat + cornstarch + constant whisking. Next time, make sure the sauce cornstarch is totally dissolved—no lumps!—and when you pour it in, be aggressive with the whisking until it coats the back of a spoon. You totally got this.