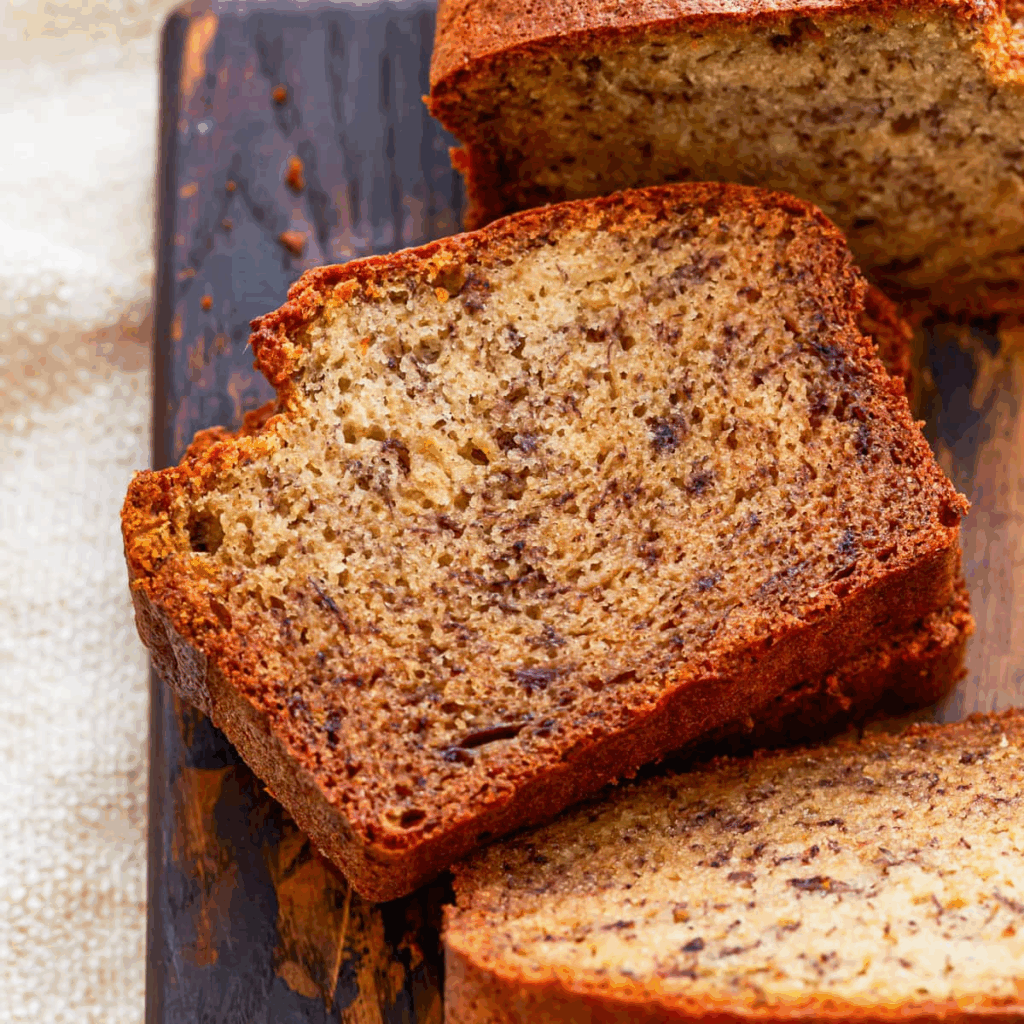
My youngest, Leo, declared war on gluten a few years ago. Not for any medical reason, mind you, but because his best friend’s mom made a “really cool” gluten-free cake. So, I embarked on a mission. A mission that resulted in a countertop littered with sad, gummy, and crumbly failures. I was about to surrender when I remembered my grandma’s old trick: a blend. Not a single, fancy flour, but a simple, humble trio working in harmony. This bread? It’s the triumphant result. Moist, tender, with a crackly sugar top that makes you close your eyes for a second. It’s the one that made Leo’s friend ask for the recipe, and the one that made me forget it was ever “free” of anything at all.
Quick Look
| Prep | Cook | Total | Feeds | Level |
|---|---|---|---|---|
| 15 mins | 65 mins | 1 hr 20 mins | 1 loaf | Easy |
Why You’ll Love This Recipe
- Seriously, it’s not dry. I fought that battle so you don’t have to.
- Uses a simple flour blend you can make from pantry staples—no expensive, hard-to-find mixes.
- The perfect way to use up those sad, black bananas languishing on your counter.
- It’s so good, no one will even ask if it’s gluten-free.
Grab These
- 3 very ripe, heavily speckled or brown bananas (about 1 ½ cups mashed)
- 2 large eggs, at room temperature
- ⅓ cup melted coconut oil (or avocado oil)
- ¾ cup coconut sugar (or light brown sugar)
- 1 teaspoon pure vanilla extract
- The Flour Blend: 1 ½ cups gluten-free oat flour, ¾ cup almond flour, ½ cup tapioca flour
- 1 teaspoon baking soda
- ½ teaspoon baking powder
- ¾ teaspoon fine sea salt
- 1 teaspoon cinnamon
- For that crackly top: 1 tablespoon of coarse sugar, like turbinado
Let’s Make It
Alright, let’s get messy. Preheat that oven to 350°F (175°C) and line a 9×5 loaf pan with parchment paper. I’m a parchment slinger for life—it guarantees a clean release every single time.
In a big bowl, mash those bananas. You want them good and mashed, but a few little lumps are totally fine—they add character. Now, whisk in the eggs, melted oil, coconut sugar, and vanilla. It might look a little separated and grainy, but that’s A-okay. Trust the process.
In another bowl, whisk together our powerhouse flour trio: the oat, almond, and tapioca. Add in the baking soda, baking powder, salt, and cinnamon. Whisk it well. I find gluten-free blends need a little extra aerating to stay light. Now, dump the dry ingredients into the wet. Use a spatula and fold just until you no longer see dry flour. Do not overmix! This is the secret to a tender crumb. A few streaks are better than a tough loaf.
Pour the batter into your prepared pan. It’ll be thick, which is what we want. Sprinkle that coarse sugar evenly over the top—this is non-negotiable for that delightful, shattery crust. Slide it into the oven and bake for 60-70 minutes. You’ll know it’s done when the top is a deep golden brown and a toothpick inserted into the very center comes out clean or with a few moist crumbs. Let it cool in the pan for 15 minutes, then use the parchment paper to lift it out onto a wire rack. I know it’s torture, but let it cool almost completely before you slice it. It’s still finishing up its magic inside.
Nutritional Facts (Per Serving)
| Nutrient | Amount |
|---|---|
| Calories | ~285 kcal |
| Protein | 6g |
| Carbohydrates | 38g |
| Fat | 13g |
| Fiber | 3g |
| Sugar | 19g |
| Note: Values are estimates |
Variations & Add-Ins
- Chocolate Chip Bliss: Fold in ¾ cup of semi-sweet chocolate chips right before pouring into the pan.
- Nutty & Nice: A handful of chopped walnuts or pecans adds the perfect crunch.
- Double the Spice: Add a pinch of nutmeg and ginger along with the cinnamon for a warmer, cozier flavor.
Serving Ideas
- My favorite breakfast: a thick slice, lightly toasted and slathered with salted butter.
- For dessert, warm it up and add a scoop of vanilla bean ice cream. You’re welcome.
- It’s perfect all on its own with a cup of strong, black coffee.
Storage & Reheating
- Keep it wrapped tightly in beeswax wrap or in an airtight container at room temp for 2 days, or in the fridge for up to 5 days.
- It freezes like a dream! Wrap the whole loaf (or individual slices) in plastic wrap and then in foil. It’ll be good for up to 3 months. Thaw on the counter.
- To revive a slice, 20 seconds in the toaster or toaster oven is magic.
My Two Cents
Don’t you dare try to use yellow, just-ripe bananas. I mean it. The blacker, the spottier, the sadder they look, the sweeter and more banana-y your bread will be. It’s the one time in life where decline is a very, very good thing.
You Asked, I’m Answering
- Can I use a different gluten-free flour blend? You can, but results will vary. This specific trio of oat, almond, and tapioca is what gives it that perfect texture. A pre-mixed blend with rice flour might make it gummier.
- My bread is dense in the middle, what happened? Two likely culprits: the bananas weren’t ripe enough, or you over-mixed the batter. Fold gently, friends!